How to add Variant Launch to your Playcanvas WebAR project
- Date
 Variant Staff
Follow the steps or video below to add Variant Launch to your Playcanvas WebAR project in less than 10 minutes.
Getting started
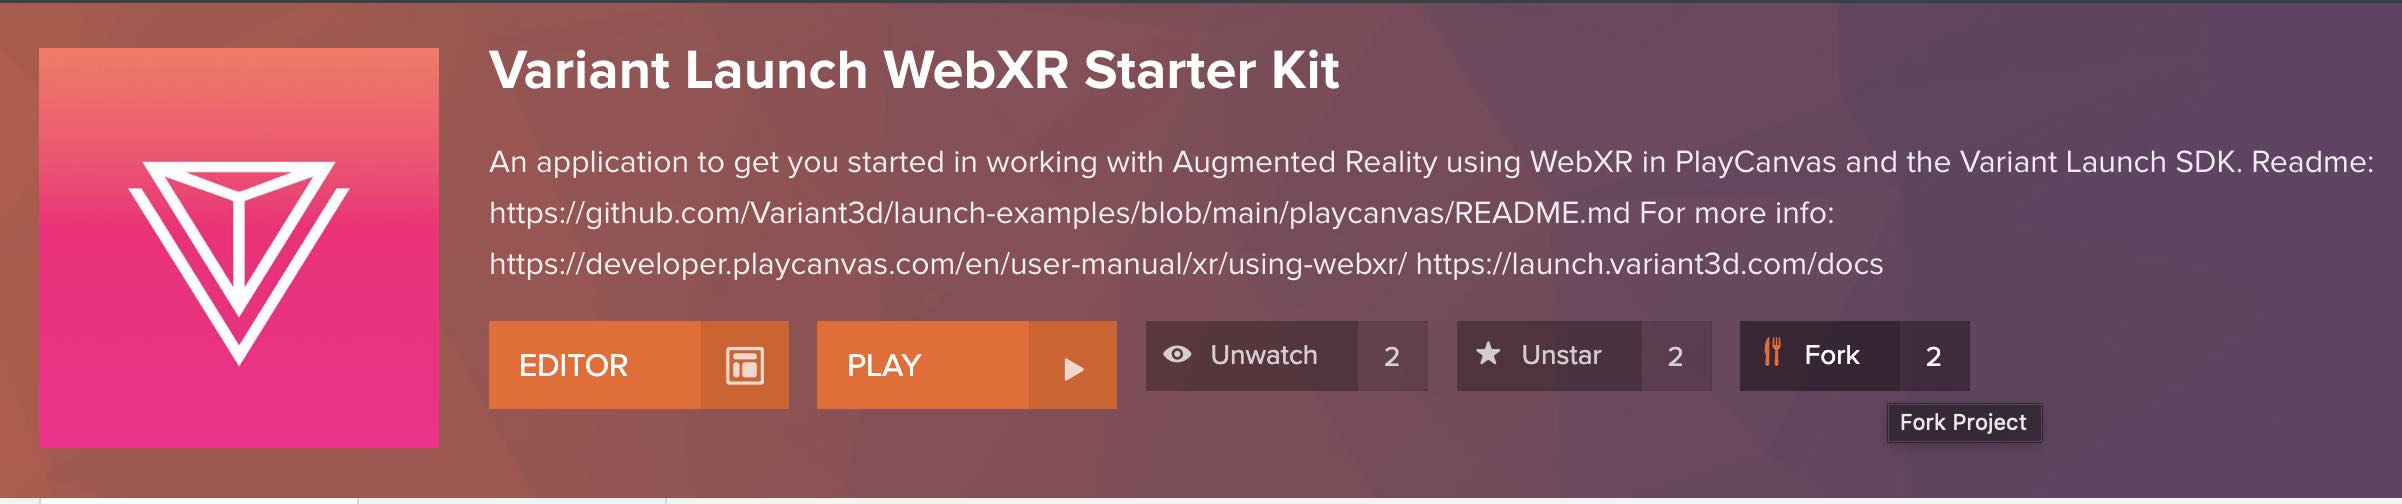
If you don’t have an existing XR project, you can fork our Playcanvas WebXR Starter Kit to get started.
If you already have an existing project, you can follow the steps below to add Variant Launch to your project.
Get your SDK Key URL
Log into Variant Launch and create a new project. Once you’ve created your project, open it and scroll to the bottom, where you will see your SDK key like below:
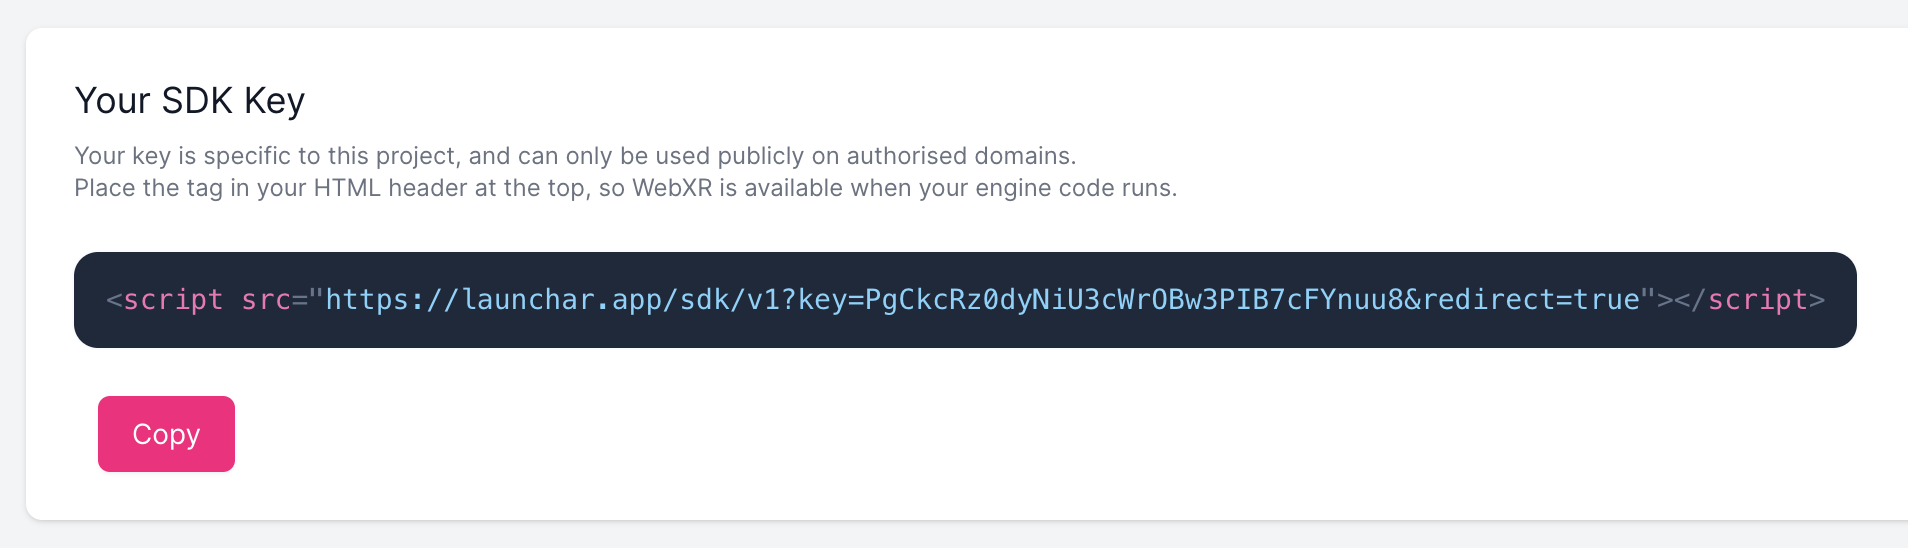
Click the code to copy it, then extract your SDK URL from the script tag. It will look something like this:
https://launchar.app/sdk/v1?key=PgCkcRz0dyNiU3cWrOBw3PIB7cFYnuu8&redirect=true
While you’re in the project settings, be sure to add “playcanv.as” to your authorized domains.
Add the Variant Launch SDK
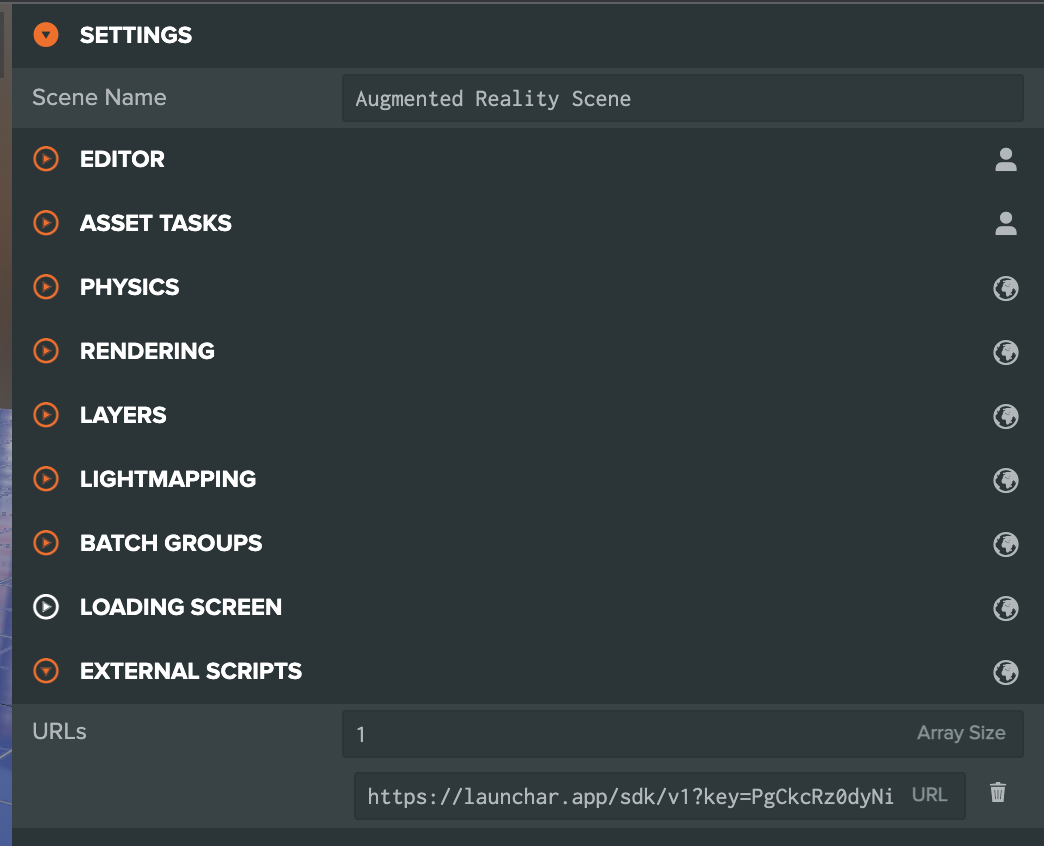
Return to PlayCanvas and open the editor view of your project, click on the Settings tab (the cog near the bottom of the left bar) and then click on External Scripts on the right menu. Change the number of scripts to 1, and paste in the URL from your Variant Launch project.
Ensure the AR camera feed is visible.
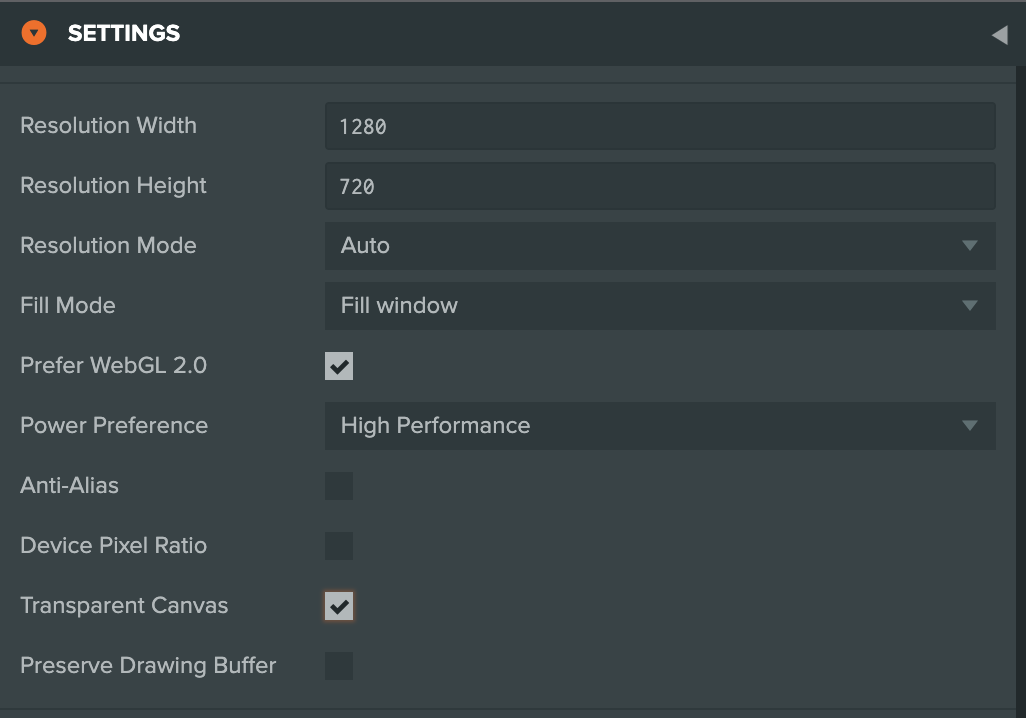
Variant Launch runs it’s camera feed under the HTML page, so we need to make PlayCanvas render only your 3D objects, and not draw a background.
To do this, first click on the Settings tab (the cog near the bottom of the left bar) and then click on Rendering on the right menu. Make sure ‘Transparent Canvas’ is checked.
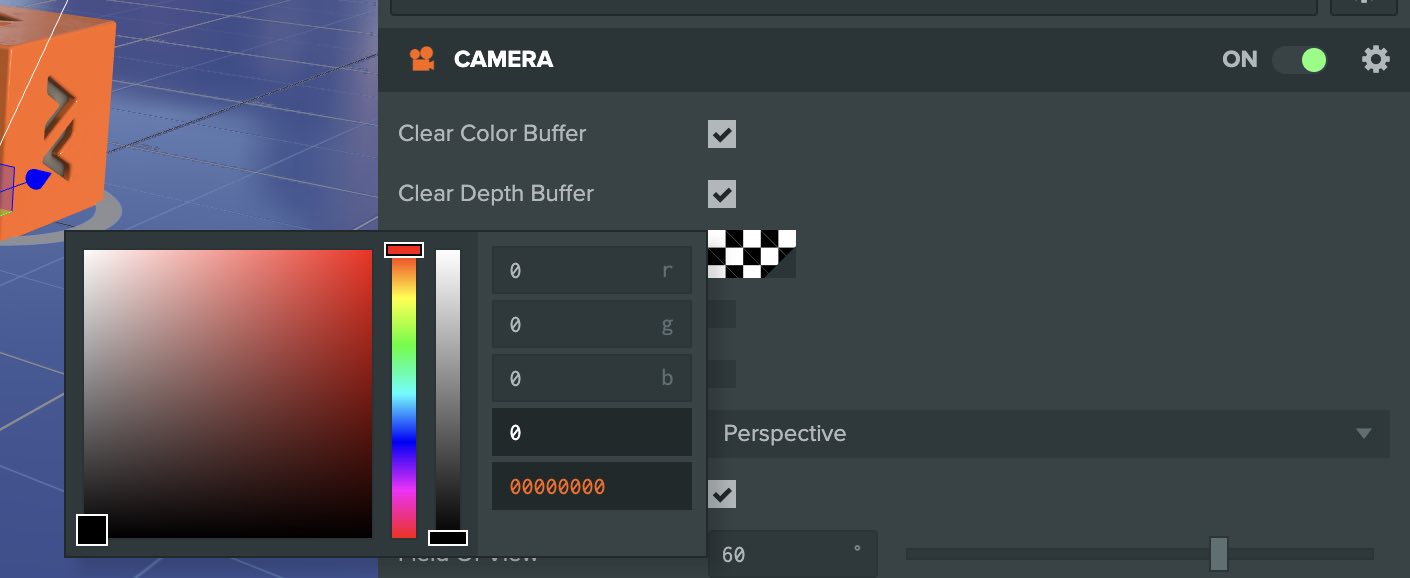
Next, select the camera in your scene and ensure that the clear color is has an alpha value (a) of 0:
Add the Variant Launch script to your scene
If you used our starter kit, you can skip this step, as it’s already been added for you under Playcanvas/Scripts/VariantLaunch.js. If you are starting from scratch, add the following code to a new script:
if(window.parent && window.parent.location.href.startsWith("https://playcanv.as/p/")){
    window.parent.location.href = window.parent.location.href.replace("https://playcanv.as/p/","https://playcanv.as/e/p/")
}

document.documentElement.style.backgroundColor = "transparent";
document.body.style.backgroundColor = "transparent";
The top line of code fixes an issue where we can’t run WebXR in an iframe, which Playcanvas defaults to. If you are hosting your project on Playcanvas, you can add /e to the start of the URL. Ensure that when you publish links to your project you are using the /e/p format, so your users won’t see a reload.
The lower line makes sure the <html> and <body> tags are transparent, so the camera feed can be seen. You may want to set this only when the user enters AR.
Thats it! You can now view your AR experience on iOS or Android devices.
Need help?
If you need help, please reach out to us on Discord or email.